


This procedure explains the variable weight settings that need to be defined on the Item Card window for items in the Lot in-Serial Out scenario.
This procedure is not meant to explain how to create an item from scratch, it only shows the variable weight settings.
To create a variable weight item
-
In the Search box, enter items, and choose Items.
-
Click New.
-
Enter a value in the No. field.
-
Enter a description in the Description field.
-
Create the item's units of measure.
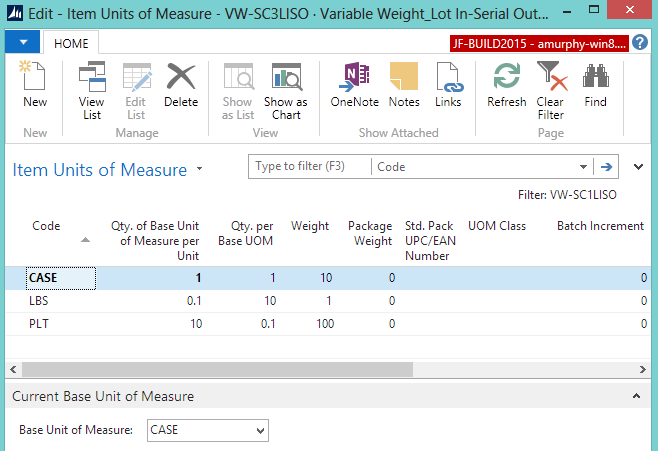
On the Navigate tab, in the Master Data group, choose Units of Measure. The Item Units of Measure window opens.
In the Code column, add CASE (or similar) as the base UOM.
-
On the CASE line, enter a value in the Weight column (which indicates the weight of a single unit. For example, a case weighs 10 pounds). The Qty. per Base UOM field is automatically populated.
Go to the next line, and in the Code column, add LBS (or whatever UOM will make up the case).
On the LBS line, enter a value in the Qty. per Base UOM column (which indicates how many pounds are in a case). The Qty. of Base Unit of Measure per Unit field is automatically populated.
-
On the LBS line, enter a value in the Weight column (which indicates the weight of a single unit).
Ensure that Allow Variable Qty. Per is NOT selected for any of the UOMs.
Select CASE in the Base Unit of Measure field.
Click OK.
Select a value for the Item Category Code field.
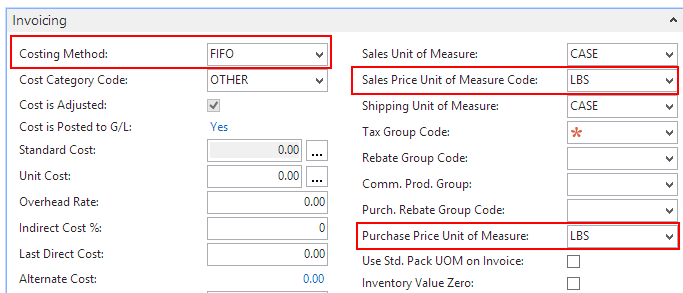
Enter information on the Invoicing FastTab.
Select FIFO in the Costing Method field.
Select the UOM that represents the weight (for example, LBS) in the Sales Price Unit of Measure Code and Purchase Price Unit of Measure fields.
-
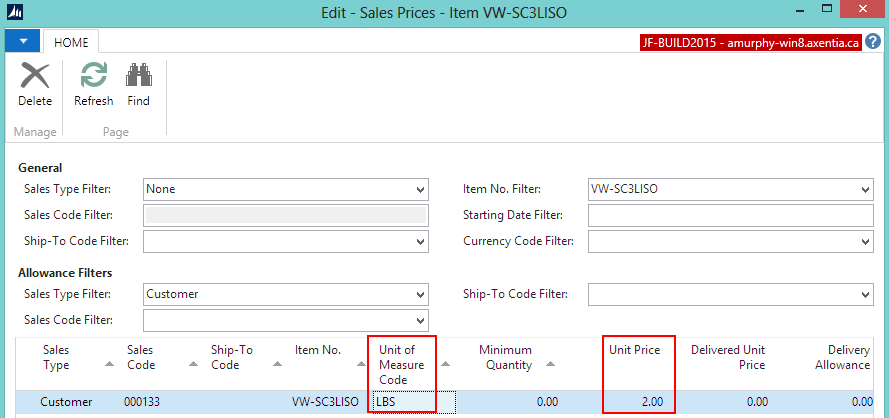
If required, you can define a sales price by weight for certain customers.
On the Navigate tab, in the Sales group, choose Pricing>Prices.
In the Sales Type field, select Customer.
-
In the Sales Code field, select the customer.
-
Set up sales prices and/or sales price calculations using the same unit of measure defined in the item’s Sales Price Unit of Measure Code field.
Click OK.
-
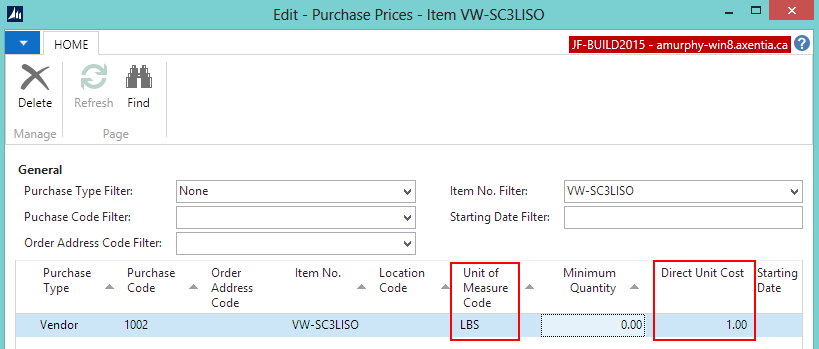
If required, you can define a purchase price by weight for certain vendors.
On the Navigate tab, in the Purchases group, choose Pricing>Prices.
-
In the Purchase Type field, select Vendor.
-
In the Purchase Code field, select the vendor.
Set up purchase prices using the same unit of measure defined in the item’s Purchase Price Unit of Measure field.
Click OK.
-
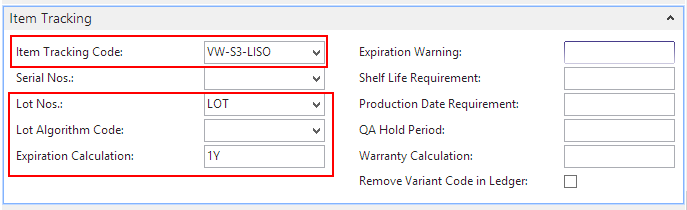
Enter information on the Item Tracking FastTab.
Select a code that is set up for variable weight (Lot In-Serial Out) in the Item Tracking Code field. If a code has not been set up, see Create a Variable Weight Item Tracking Code for the Scenario Lot In-Serial Out Scenario.
Select a value in the Lot Nos. or Lot Algorithm Code field.
Enter a value in the Expiration Calculation field.
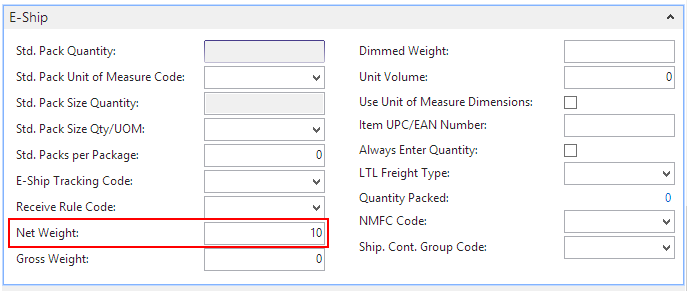
On the Actions tab, in the Functions group, choose Weight>Calculate Net Weight.
The Net Weight field is populated on the E-Ship FastTab. The net weight is calculated based on the defined units of measure (for example, if a case weighs 10lbs, then the net weight is 10lbs). The net weight flows to document lines (sales, picks, warehouse entries).
-
Click OK. The Item Card window is closed.
See Also
 Tip Tip |
|---|
For more information about how to work with fields and columns, see Work with Data. For more information about how to find specific pages, see Search. |